Invoicing
General
- Sierra offers the ability to enter invoices into the system in one of two ways:
- create invoices manually
- receive invoices electronically through vendors
- Invoices are held in a session until you post the session. When you post a session, the invoice, cancellation, or adjustment data contained in it are used to update funds, order records, the payment history file, and vendor records. You can post as soon as you create an invoice or at a later time. During posting, the system prints encumbrance, invoice, and posting registers and an invoice summary.
- Until the order records in an invoice are posted, the order records will be “busy” and cannot be updated or received.
- Receiving and invoicing are separate functions in the system. You can create invoices before, during, or after receiving items.
Set-up
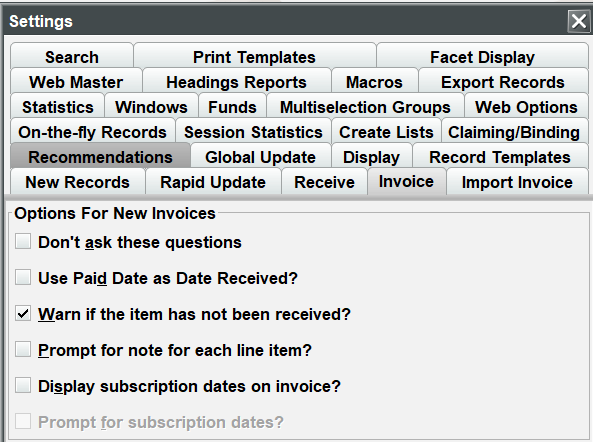
- The system prompts you for settings only for the first invoice in a session; subsequent invoices use the same invoice settings. Sierra does not display the dialog at all if you have selected Don’t ask these questions in the Invoice settings.
- Go to Admin/Settings/Invoice in Sierra
- Check the Don’t ask these questions box
- Check the Warn if the item has not been received box
- Select Save Settings
Pay an Invoice
- Once you receive a paper invoice, you need to process it to input the vendor’s actual charges into the system.
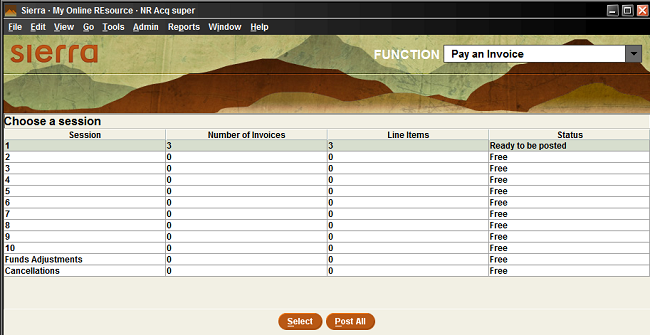
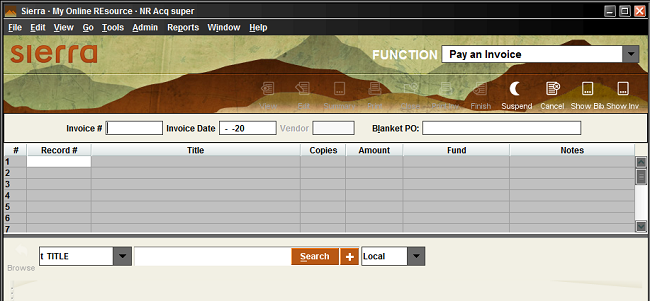
- Choose Pay an Invoice from the Function drop-down list.

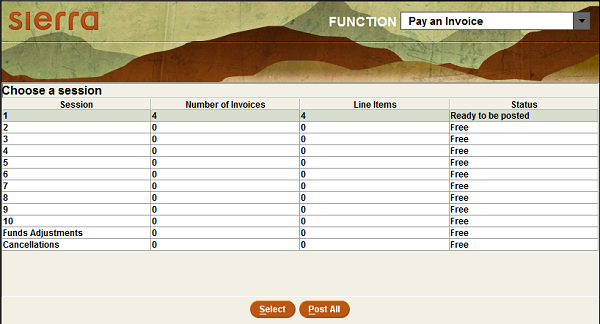
- Choose a session from the table and choose Select. The table also displays the current number of invoices and line items entered in each session because there is a maximum number of invoices and line items allowed in Sierra.
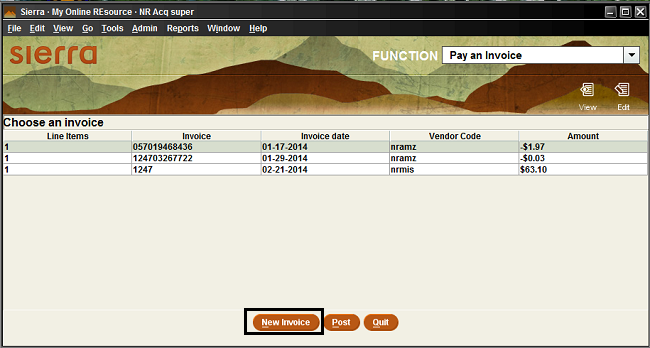
- To create a new invoice, select an empty/free session or choose the New Invoice button in an existing session
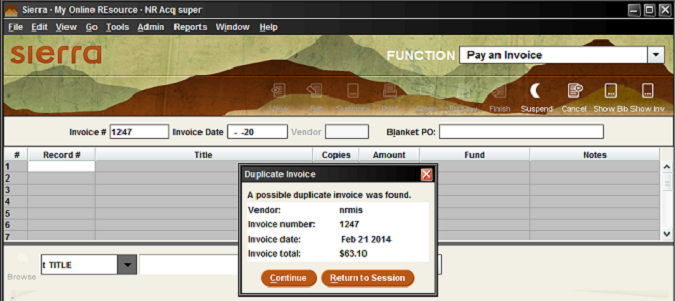
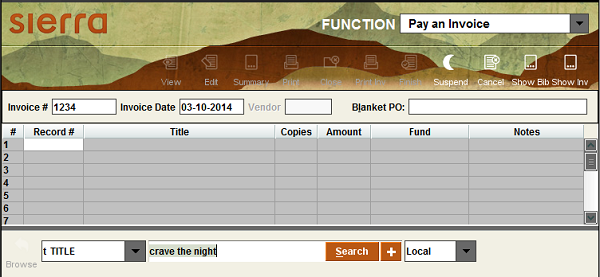
- Enter the invoice number and press Enter. Note that this field is required. If there is no invoice number, press Space or enter NONE and then press Enter. The invoice number can be up to 19 alpha-numeric characters.
- When you press Enter, Sierra searches the database for duplicate invoice records using the invoice number you entered. If a potential duplicate record is found, the system displays the Duplicate Invoice dialog.
-
- If the system finds more than one potential duplicate record, the dialog does not list the record-specific information. Choose either Continue to continue creating the invoice or Return to Session to cancel the invoice.
- Enter the Invoice Date. This is a required field.
- If applicable, enter the blanket purchase order number in the Blanket PO box and press Enter. See section below for more information.
- Enter the record number for the first line item. When you enter a valid record number and press Tab or click into the next field, Sierra automatically fills in the title and the vendor code for the line item. Entering the period (.), the letter ‘o’ for order record, and the check digit are optional when you enter the record number in the invoice.
- You can also search for the item in the bibliographic display below the invoice.
-
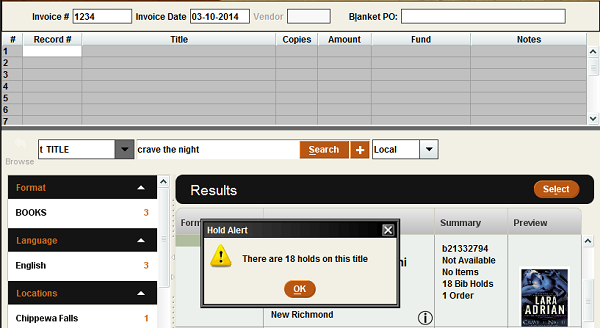
- Search for and find the item in the bibliographic record display.
- Select the record or double-click the correct record.
- A hold alert will pop up indicating the number of holds on the bibliographic record
-
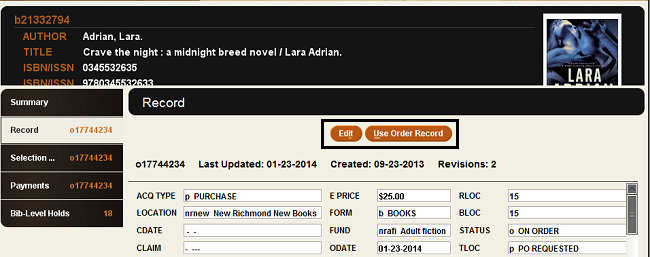
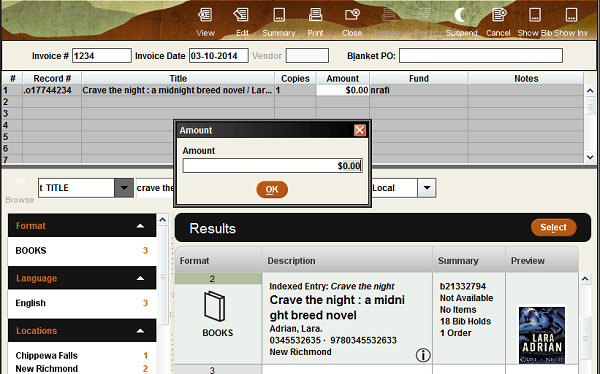
- Choose the Use This Record button to add it to your invoice or close the record by choosing Close from the toolbar. When you search for a record and choose Use This Record, the system prompts you for the Amount (and List Price, if applicable). You can also edit the item by choosing the Edit button. From the edit screen, you may View Finances, Use This Record, or Exit Edit.
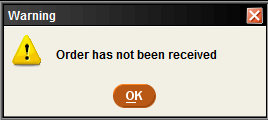
- A warning will appear if the item has not been received
- Any unshaded fields on the invoice entry screen indicate that they can be edited anytime during this session.
- For multiple copy orders, enter the number of copies you will pay for and choose OK. The number does not display until you have fully entered the line item.
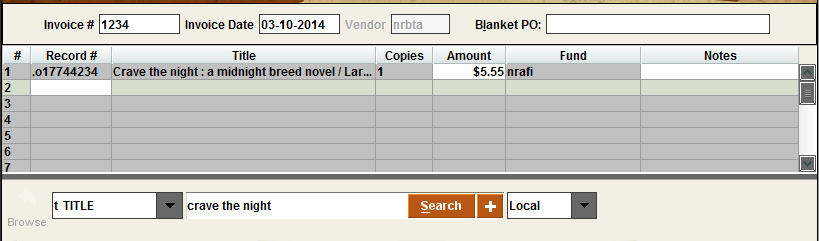
- In the Amount column, enter the amount you are paying as follows:
- For multiple-copy orders, enter the total amount you are paying.
- For single-copy, multi-fund line items, enter the amount of the item. The system automatically calculates the amount to be expended for each fund based on the percentages entered in the order record. If necessary, you can change the amount associated with a fund on the invoice.
- For X Records, you must enter an amount if you have not done so already in the Creating X or Y Records dialog. If you do not enter an amount at this point, the line item for the x record will be removed. For further information, see section on X Records below.
 5.
5.
- Add any notes for the line item. The note can be up to 35 characters and cannot contain a backslash () or pipe (|) character. Additionally, do not use the asterisk character, as it is reserved for partial payments. A multiple-copy order can have only one note
- Press Tab or click on the next Record # field to go to the next line item or click in the bibliographic display below the invoice to search for the next item.
-
- Each invoice can hold up to 500 line items. You can remove a line item using the Tools | Remove Line option.
- If you enter at least one line item in an invoice and your session is interrupted, the system automatically suspends that invoice.
- To calculate the totals for the invoice, choose Finish or press Enter at the order record prompt. Before proceeding to the next step, the system prompts you to verify whether you are done entering line items or if you still want to continue adding items to the invoice. To cancel the invoice, choose Cancel. To retain what you have entered and exit the invoice but not “finish” it, choose Suspend.
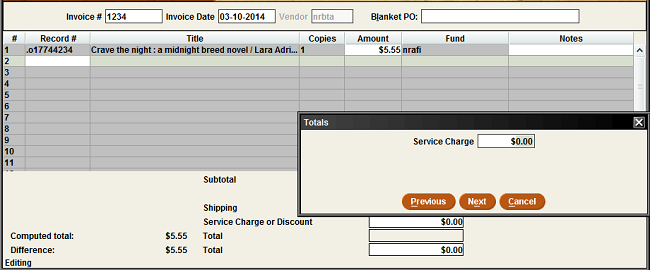
- The invoice total displays as $0.00 until you enter a total. The total calculated by the system does not display unless you choose Use computed total.
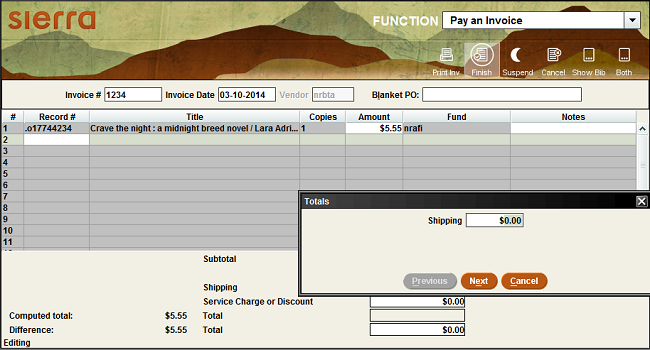
- Enter amounts for shipping, service charge or discount, tax (if applicable), and the invoice total. To enter a discount in the Service Charge or Discount box, enter a minus sign (-) followed by the amount.
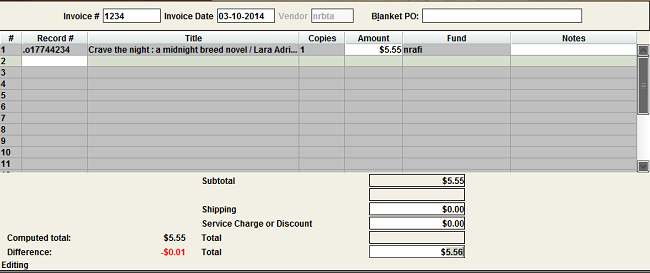
- If the invoice total you enter does not match the total charges from the line items you entered, Sierra displays the difference.
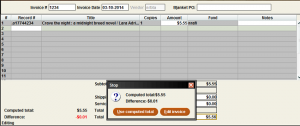
- Choose Finish a second time. The system prompts you if the total you entered does not match the total calculated by the system. Choose Use computed total to use the total calculated by the system, or choose Edit Invoice to return to the invoice to correct errors in the line items or the totals.
- Sierra returns you to the Invoice summary screen, where you can Post your invoice or create another New invoice.
Suspending an Invoice
- By suspending an invoice, you can exit an incomplete invoice and save your changes for later processing. Any time you close an invoice with at least one complete line item, the invoice is suspended. You can suspend an invoice you have just created, as well as a finished invoice you have chosen to edit. Begin entering an invoice. Once you have entered at least one line item, you can suspend the invoice.
- Choose Suspend or close the invoice.

- You can resume entering the invoice at any time.
- Suspended invoices appear in red.
- When an invoice is suspended, Sierra busies the order records included on the invoice.
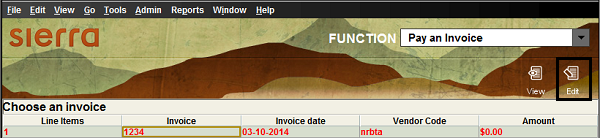
Editing Suspended and Finished Invoices
- Sierra allows you to edit invoices at any point prior to posting, including both suspended and finished invoices.
- Choose Pay an Invoice from the function drop-down list
- Choose the session containing the invoice you want to edit. The system displays the invoices that have already been created in that session. Invoices that are suspended appear in red, and finished invoices are in black.
- Select an invoice and choose Edit.
-
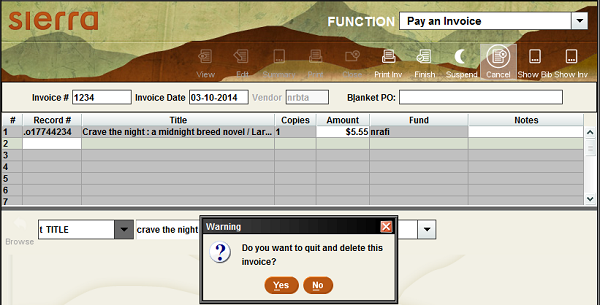
- Note that the Cancel button on the toolbar does not cancel the editing session, but rather prompts you to delete the entire invoice (regardless of whether the invoice was previously finished or not). To close an invoice that was accidentally chosen for editing, you can either suspend or finish the invoice.
- Finish the invoice. If you are editing an invoice that was previously finished, the system prompts you again to enter the invoice totals, but includes the previous totals as defaults.
Blanket POs
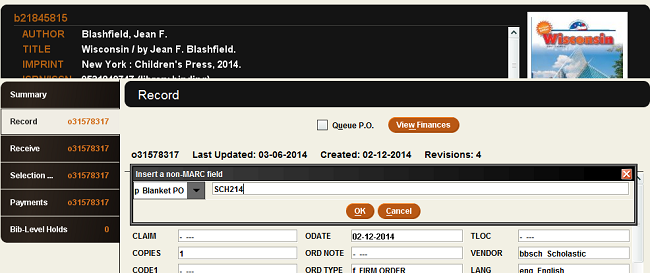
- Sierra supports blanket purchase orders throughout the ordering, claiming, and invoicing processes. During the process of creating an order record, you can enter the blanket order number in the Blanket PO variable-length field. After you have entered this number in the order records, you can use the blanket order number to retrieve all orders during invoicing with the same blanket order number.
- Create order record(s) that include a blanket order number by inserting a blanket po. Use something for the code that you will remember; for instance, three letters of the vendor name and the date.
- Choose a session from the table and choose Select.
- To create a new invoice, select an empty/free session or choose the New Invoice button in an existing session
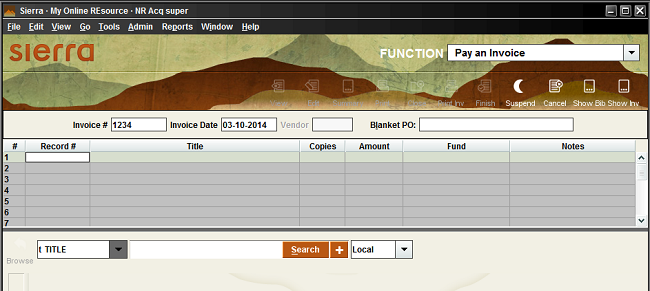
- Enter the invoice number and date and press Enter. Note that these fields are required.
- Enter the blanket purchase order number in the Blanket PO box and press Enter. If you enter more than one blanket order number, separate each one with a comma. When finished, press Enter.
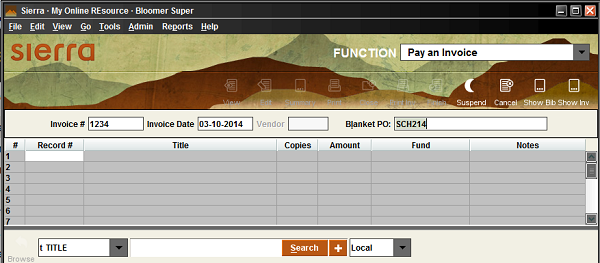
- Sierra display the Blanket PO workform
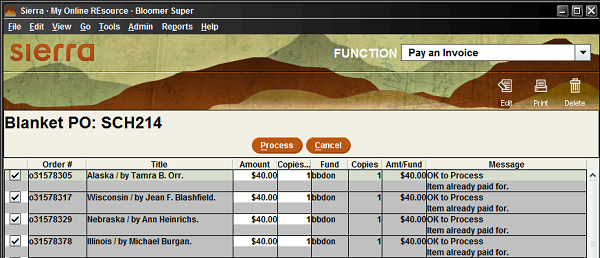
- The Blanket PO workform displays information for each order in the blanket purchase order(s), including a message indicating whether the order record can be processed or not. Note that an order can have multiple messages associated with it.
- Resolve all error messages which block the order record from being processed. The Process button is grayed out until you resolve all of these error messages.
- To resolve an error message, choose one of the following methods:
- Edit the order record to correct the missing or bad data. For example, if you receive the message NULL status, change the STATUS field in the order record to a valid status. You can access the order record by double-clicking on the row in the workform or selecting the row and choosing Edit.
- Uncheck the boxes in the left-hand column for the order. By default, all orders are selected when Sierra initially displays the workform. Note that the system excludes orders on the final invoice that are not selected on the workform. This is useful when the orders come in multiple shipments and invoices.
- Order records with the Busy record or Max paid fields message require you to suspend the invoice to resolve the outstanding issue.
- You can Print the workform at any point before processing the orders. The workform printout is particularly useful to track any orders you have excluded from the final invoice.
- To resolve an error message, choose one of the following methods:
- Edit the information in the Amount and Copies to Pay columns if it differs from your paper invoice. To expedite invoice processing, Sierra fills in these columns using data from the order record. For the Copies column, the system calculates the number of unpaid copies in the order record. The Amount column is equal to the estimated price times the number of unpaid copies.
- Once you have finished entering copy and amount information, choose Process to create the invoice. Sierra uses the information on the workform screen to populate and display the invoice. You can add additional line items or edit existing line items.
- Finish the invoice as described above.
X-records
***This is a work around for adding x and y records to Sierra. Problem-I’m not able to enter x or y records in Sierra for line items that have no order record. When I type “x” or “y” and then Tab in “Pay an invoice” function of acquisitions workflow, I see the message “Are you done keying line items?” Solution-When entering x or y records in Sierra’s Pay an Invoice function, type x or y and then space. After this press the Tab key, to see the pop-up screen called “Creating X or Y Records.” If you only type x or y and then press the Tab key, you will see the message “Are you done keying line items?” Alternatively, you can type x- or y- and then press Tab. Then the pop-up screen called “Creating X or Y Records will appear. 5/5/2016.bk
- In Sierra, any line item for which there is no corresponding order record can be entered on an invoice as an x record.
- This is useful when entering invoices for subscriptions/standing orders where you pay an annual invoice (Center Point, Thorndike/Gale, Junior Library Guild) or for other budget items such as programs or supplies (if you have chosen to include those budget items in Sierra.
- Create an invoice
- On a new line on the invoice, enter an “x” as the first character of the record number. This record number can be up to 11 characters and cannot contain the pipe (|) symbol. Sierra displays a dialog box in which to enter x record information.
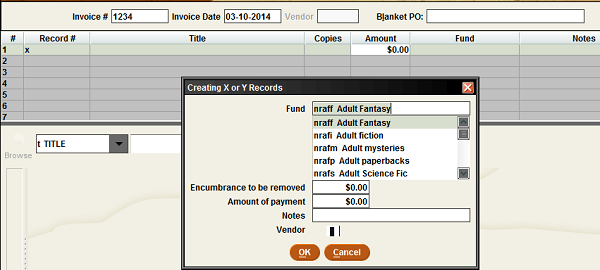
- In the Creating X or Y Records dialog box, enter the Fund, Encumbrance to be removed (usually “0”), and the Amount of payment. You can also enter a Note of up to 35 characters. If your library uses subfunds, you must also enter the Subfund.
- Choose OK to return to the invoice. Choosing Cancel clears the x record line item.
- Finish creating the invoice
- If the invoice already has a vendor, Sierra uses that vendor for the x record; however, if the x record is the first line item in the invoice, the system prompts you to enter a vendor name from the list of vendors.
Y-records
- Line items on an invoice that are not prorated for tax, shipping, or other charges are referred to as y records.
- Create an invoice
- On a new line on the invoice, enter an “y” as the first character of the record number. This record number can be up to 11 characters and cannot contain the pipe (|) symbol. Sierra displays a dialog box in which to enter y record information.
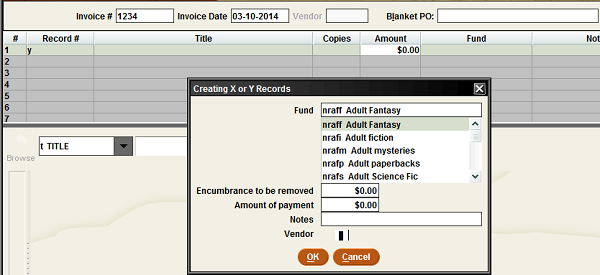
- In the Creating X or Y Records dialog box, enter the Fund, Encumbrance to be removed (usually “0”), and the Amount of payment. You can also enter a Note of up to 35 characters. If your library uses subfunds, you must also enter the Subfund.
- Choose OK to return to the invoice. Choosing Cancel clears the y record line item.
- Finish creating the invoice. You cannot “finish” an invoice that contains only y records. The invoice must contain at least one “real” order record.
- If the invoice already has a vendor, Sierra uses that vendor for the y record; however, if the y record is the first line item in the invoice, the system prompts you to enter a vendor name from the list of vendors.
Posting
- You can post an invoicing session at any time after entering the invoices, as long as all of the invoices are in the session are finished. Each session can contain up to 200 entries, and the Payment History file can contain up to 10,000 entries.
- When you post invoices, Sierra:
- encumbers or disencumbers funds as appropriate
- updates fund expenditures
- updates the payment history file
- clears the posting session
- In addition, the following changes are made to the order records included in the invoices you post:
- updates the STATUS field
- adds a PAID field
- adds an INT NOTE field for claims or cancellations
- Posting encumbrances only: normally, all encumbrances post when you post any session. However, you can post encumbrances at any time after creating the order record and encumbering the funds. Note that the encumbrances are stored in a system file (called the lien file) not visible to you. If there are no invoices in the sessions, it might appear that there is nothing to post. If you choose the Post All button, the encumbrances in the lien file are posted.
- To post, follow the steps below:
- Choose Invoice from the drop-down Function list.
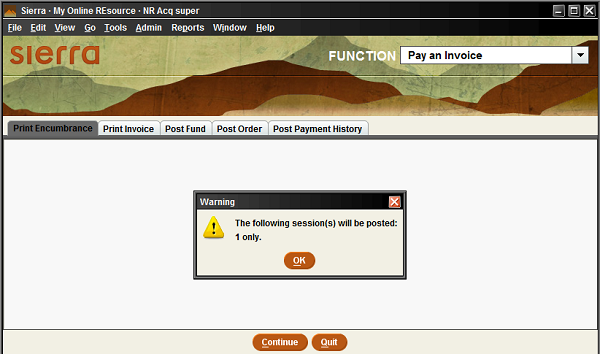
- Choose any session that is “Ready to be posted.” Or choose the Post All button to post all session listed as “Ready to be posted.” If you post all, the sessions are posted in numerical order.
-
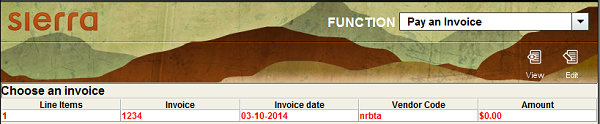
- If you select a session, you will see a “Choose an invoice” display. You can select any of the listed invoices and View them, if desired. When you are ready to post, choose the Post button.
-
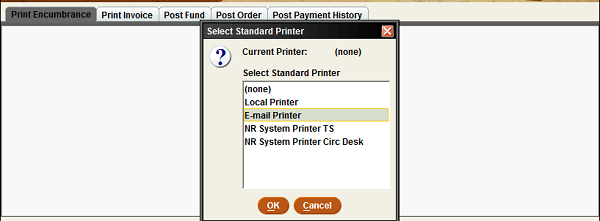
- If you have not selected a standard printer, the system prompts you to select one. Choose email printer.
-
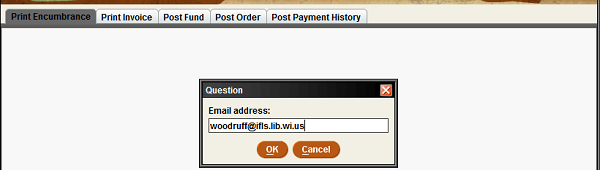
- Enter your email address. This should be saved in a macro; generally it’s in F12.
-
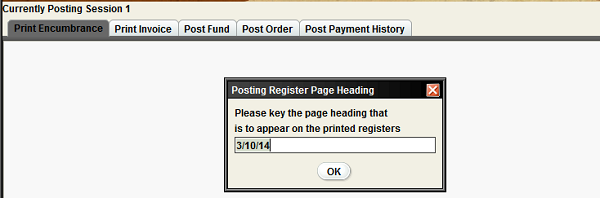
- Enter a page heading for the posting register and choose OK. You can enter up to 29 characters or you can leave this blank. Usually, today’s date is entered into this field or a description of what is contained in the posting session, such as Cancellations or Funds Adjustments.
-
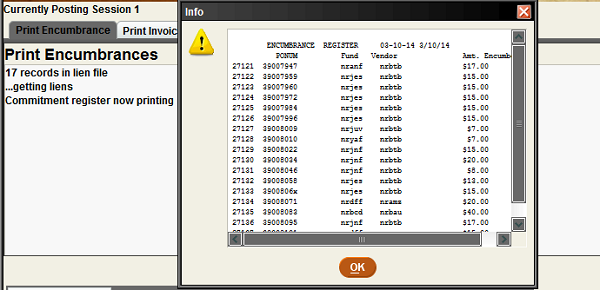
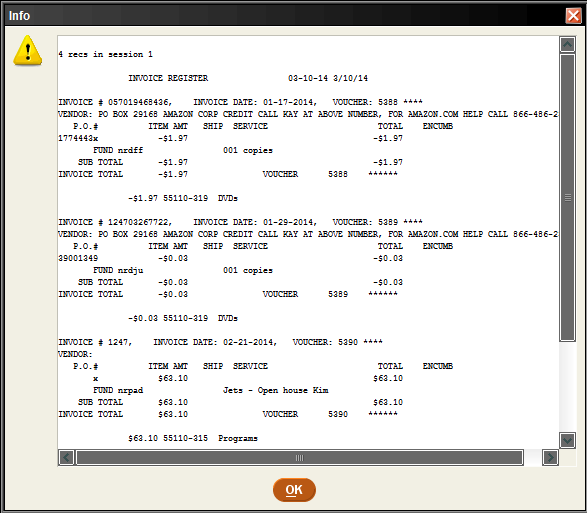
- After you choose OK to enter the page heading, Sierra prints the Encumbrance Register, Invoice Register, and the Invoice Summary

-
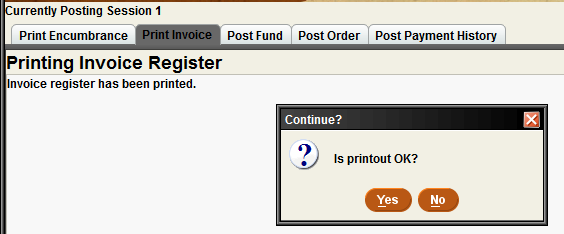
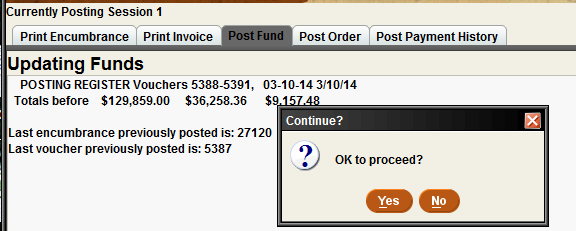
- After Sierra prints the reports, the system prompts you Is printout OK? If there is a problem with the reports, choose No; the data is saved so you can post the file again. To continue, choose Yes; the data is cleared and the system prints the Posting Register.
-
- After the Posting Register prints, the system prompts you again to continue posting. Choose Yes to continue or No to cancel posting and return to Choose a session panel. The data is saved so you can post the file again.
-
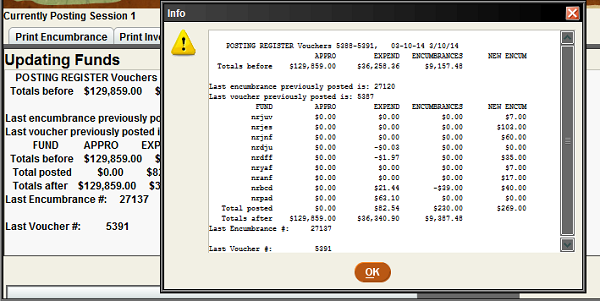
- If you choose Yes, Sierra updates the order, invoice, and vendor records, as well as the funds and Payment History file, with the payment information. When posting is completed, the system displays a posting summary report. Note that the posting summary report displays on the screen (on the Post Payment History tab), but does not print.
-
- Choose Quit to return to the list of sessions. If you chose Post All, choose Continue to post the next session.